The Redmond-based software company added a visual framework for game developers, so they can create breathtaking graphics for computer games. There are multiple ways you can fix the Visual Redistributable package error in the latest operating system, and I have compiled a list of viable solutions for you.
What triggers Microsoft Visual C++ 2015 – 2019 Redistributable error?
Apex Legends was not lagging or witnessing any sudden frame drops, but the visual experience was shattered due to the missing components. The AMD Radeon Software was having trouble running a few features in the control panel. We have the right to know the root cause of the problem, so you can prevent MSVC package errors in Windows 11.
Newer Windows build version shortcomings.MalwareCorrupted System FilesCorrupted Registry KeysOutdated driversCorrupted MSVC packages
We will address the problems mentioned above, and you can apply the solutions effortlessly.
1. Check Windows System Files
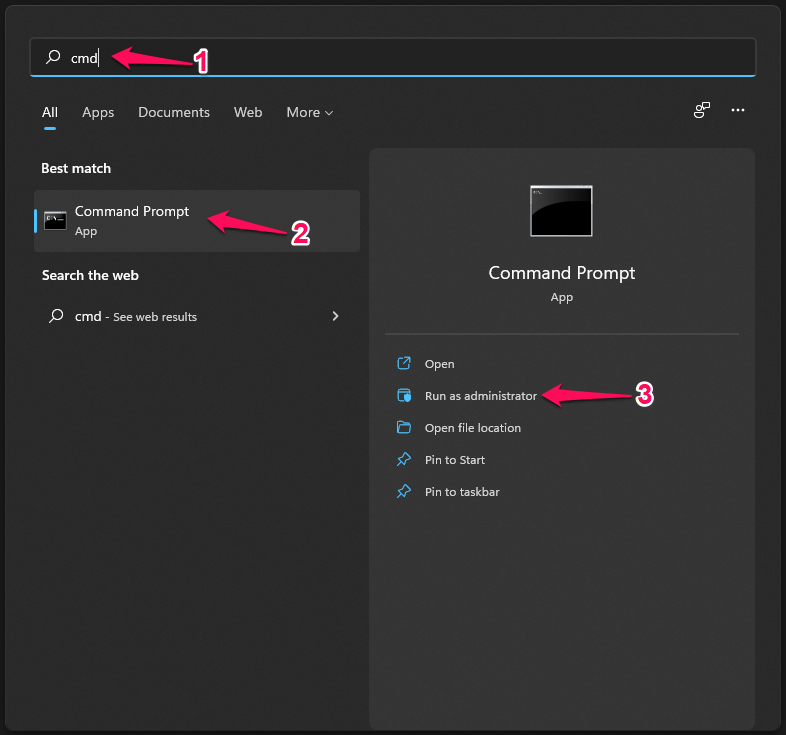
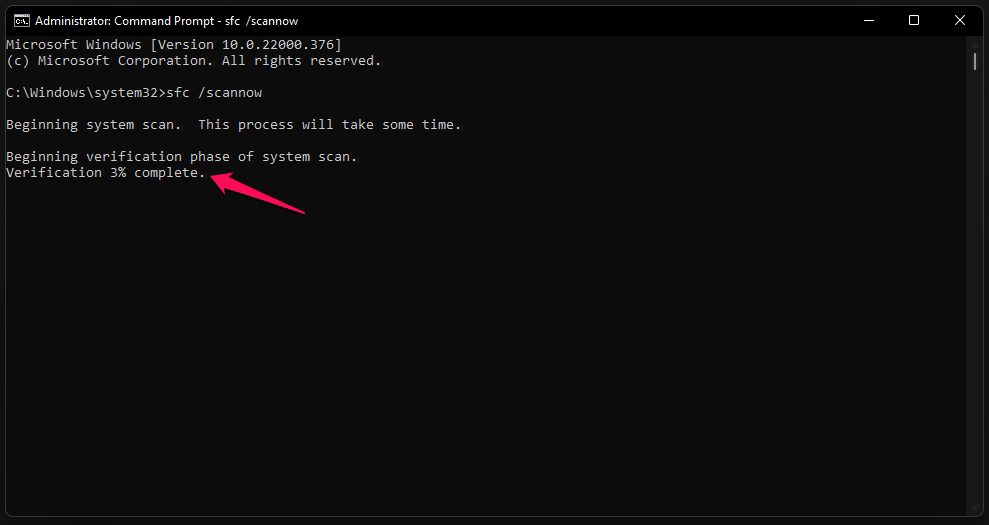
We have to identify the culprit to resolve the matter sooner, and it is better, to begin with, Windows system files. Let me show you how you can verify the system files integrity and strike out Windows software corruption. Step 1. Open Command Prompt as administrator.
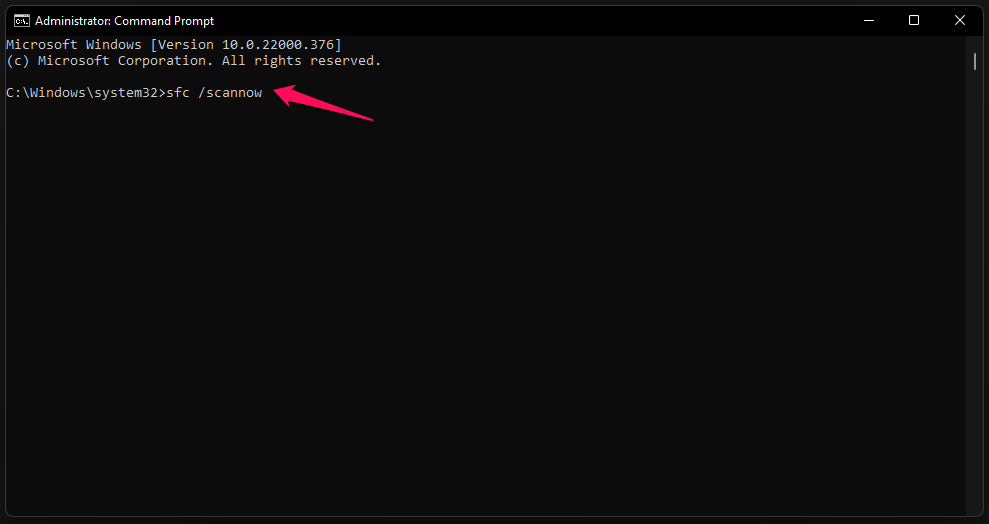
Step 2. Copy and paste the “SFC /scannow” command in the Command Prompt.
Step 3. The system files verification process begins, and you have to give a minimum of ten minutes for the process to finish.
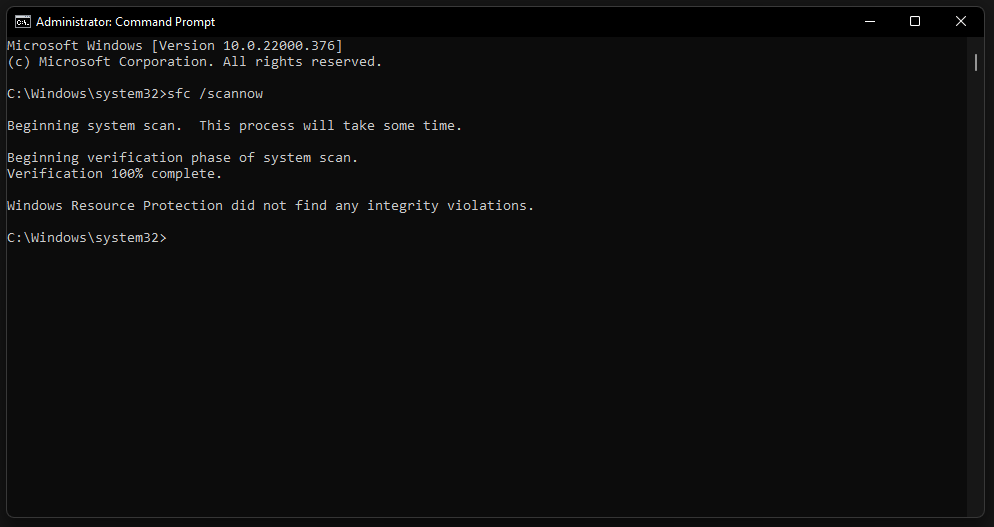
The scanning process takes less than ten minutes to finish if Windows is installed on an SSD. The mechanical hard drive (5200rpm) takes more than twenty minutes to hit 100%. Step 4. My Windows 11 copy doesn’t have corrupted system files.
“Windows Resource Protection did not find any integrity violations.” I got nothing to worry about it, and I can move on to applying the next solution. You should be concerned if the “Windows Resource Protection found corrupt files but was unable to fix some of the files” result shows up on the screen. Follow the last tutorial to resolve the corrupted system files issue.
2. Corrupted Game Files
Modern games are highly dependent on the MSVC packages, and that’s what makes gaming superior in Windows. It is one of the contributing reasons why Apple and Linux are not able to compete in the segment. Of course, Apple is not focusing on the gaming industry, and the open-source world will eventually catch up with Microsoft. Your game files might be corrupted and causing the MSVC to fail in the process.
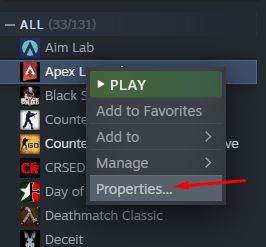
Open Steam and find the game in the library.
Select the problematic game from the library and right-click the mouse to open the game “Properties” to view more.
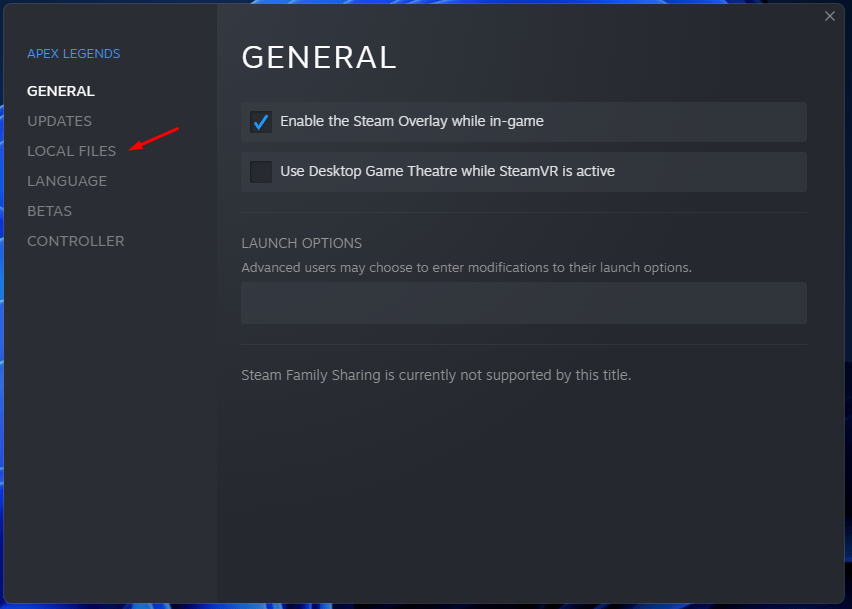
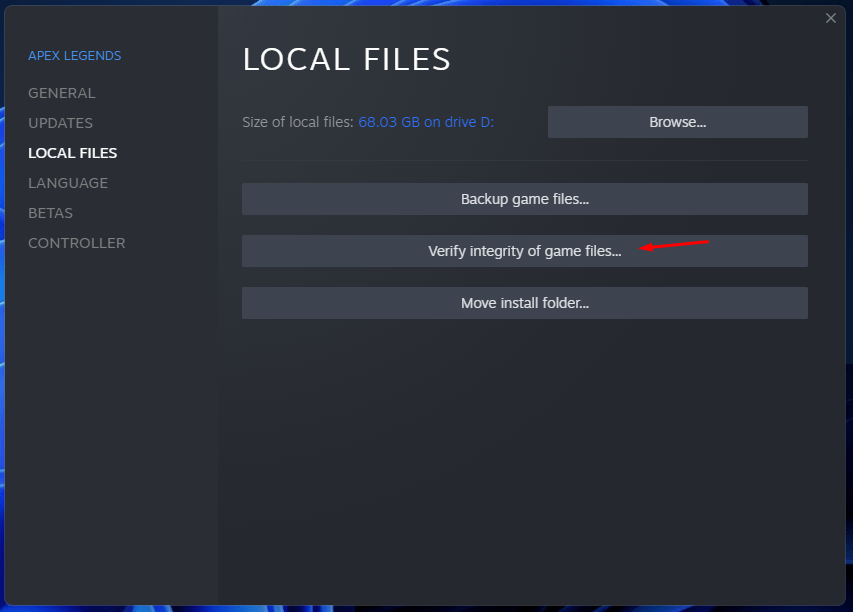
Game properties show up on the screen, and select “Local Files” from the pop-up window.
You have plenty of options on the screen and click on “Verify integrity of game files” to scan the files.
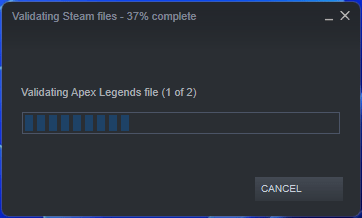
You have to let the program take care of the scanning process, so do not force close the gaming machine.
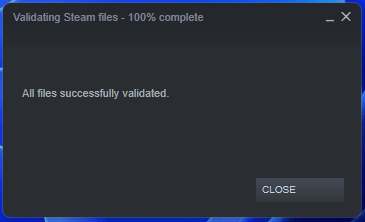
Click “Close” to end the task.
Many budget gaming machines have mechanical hard drives as a storage expansion solution, so you can expect the scanning process to last an hour. Of course, the game files scan duration depletes, if the games are saved on SSD (Solid State Drive).
3. Reinstall Visual Studio 2015 – 2019 Package
Now, we have to take matters into our hands and try to resolve the problem in the old fashion. We have to uninstall the package in the system and reinstall the Visual Studio 2015 – 2019 package manually. Let me show you how things have gone in my case and what I had to do to resolve the issue at the end of the day.
Uninstall:
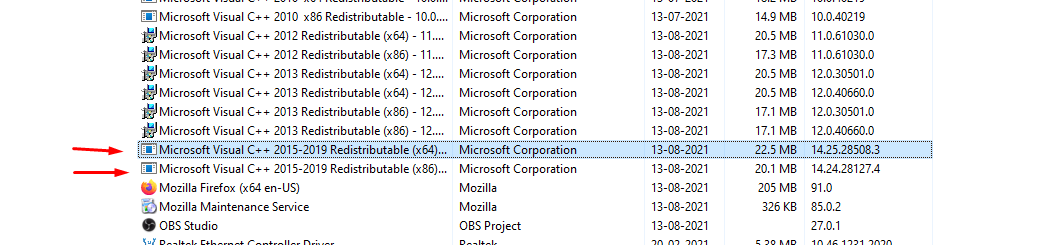
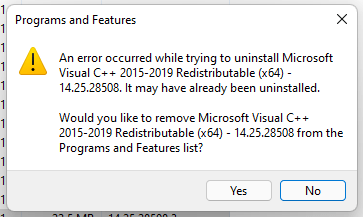
Press Windows Key and S to reveal the search bar.Open “Control Panel” from the search bar.Click on the “Uninstall” option in the Control Panel.Select Visual Studio C++ 2015 – 2019 redistributable package and uninstall it.
An error popped up on the screen, and it couldn’t find the installed folder in the drive.
Click on “OK” to remove it.
Uninstall x86 and x64 versions from the machine, so do not spare either of them.
Install:
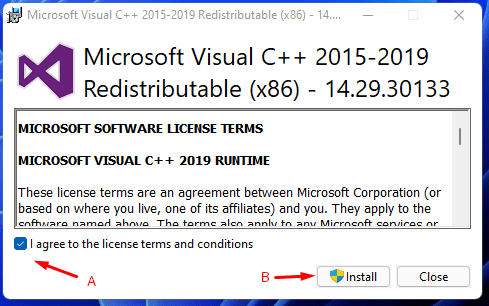
Download the Visual Studio package from the official site.Open setup files as administrator.Read the agreement and terms, then click on the “Install” option.
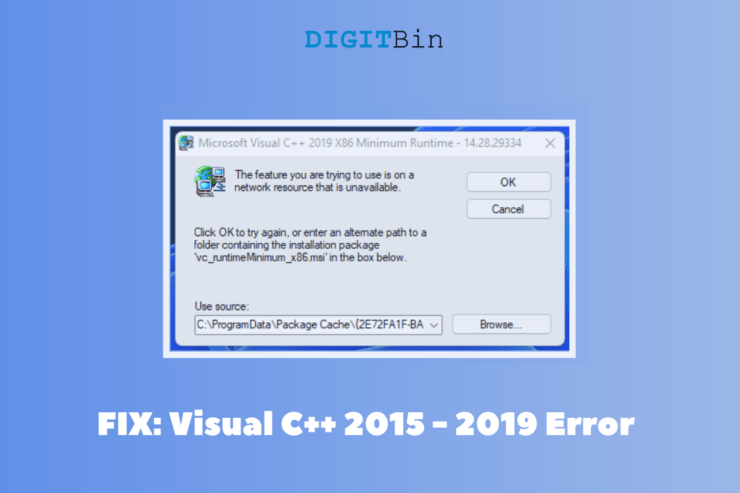
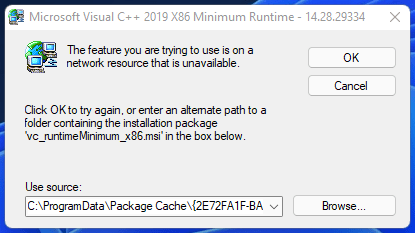
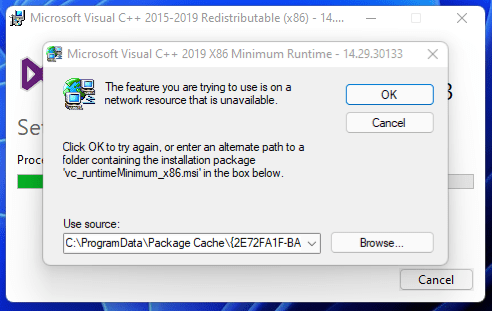
A message showed up on my screen “The feature you are trying to use in on a network resource that is unavailable”. I clicked on “Cancel” because I’m trying to install it.
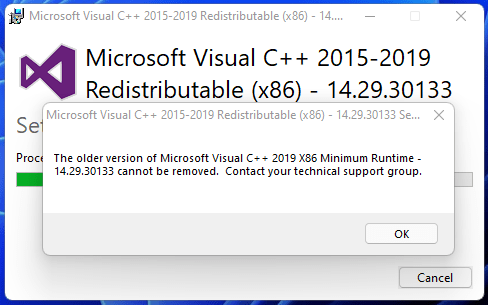
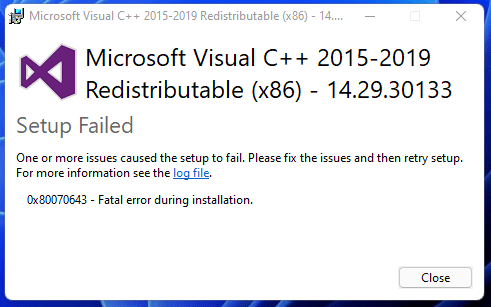
Another message showed up on the screen, “the older version of Microsoft Visual C++ 2019 cannot be removed”.
Setup failed.
You should be able to reinstall the package in the system, but that didn’t happen in my case. So the re-installation part was a complete dud in my case. But, this solution may work in your system since the scenario is different from my Windows 11 machine. The next solution comes in handy when dealing with dislocated files and folders in the operating system.
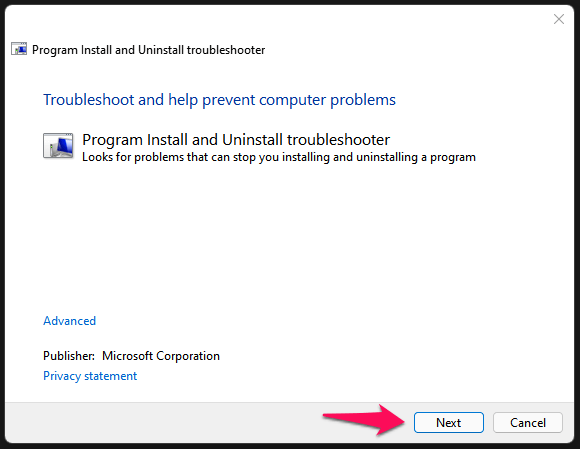
4. Use Install and Uninstall Troubleshooter
Microsoft added a dedicated Install and Uninstall Troubleshooter, and it’s not available in the Windows 11 software. You can download the executable program from the official site, and you don’t have to worry about compatibility issues. The official developers designed the troubleshooting tool to work in the latest Win 11 software. I will show you how to install the Visual Code C++ 2015 – 2016 Redistributable package in the Windows 11 copy.
Download the Install and Uninstall Troubleshooter from the official site.Open the troubleshooter.
Click on the “Next” option.
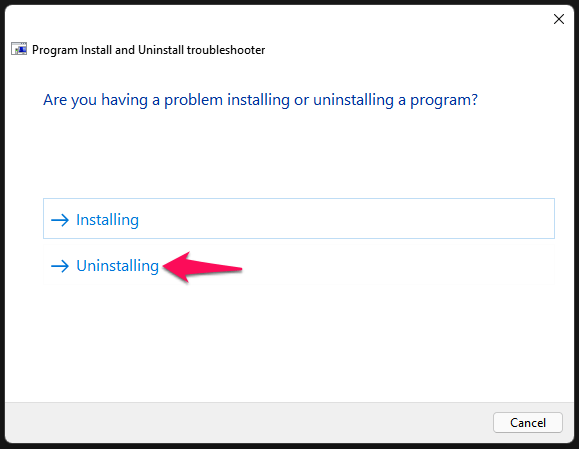
Choose “Uninstalling” from the two options.
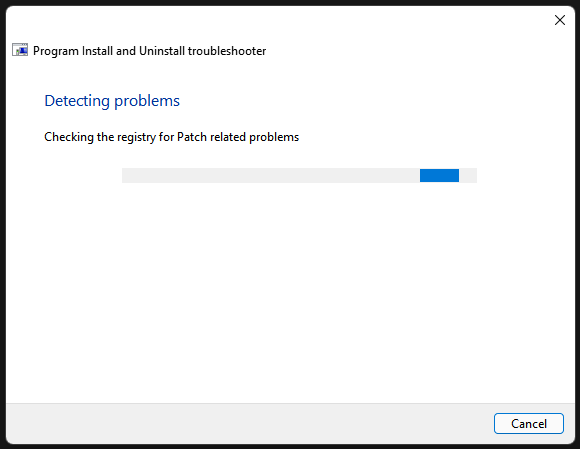
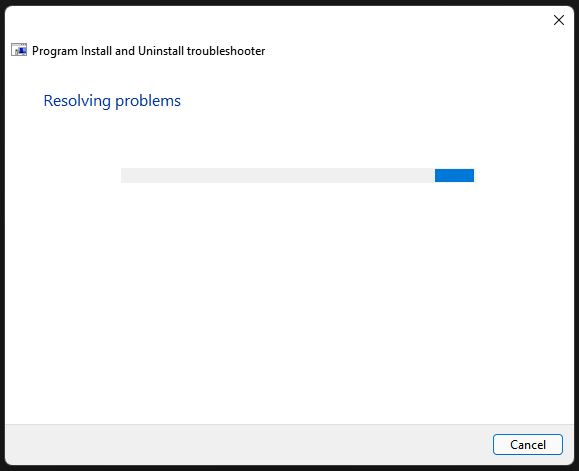
Let the troubleshooter scan the system and load the installed programs.
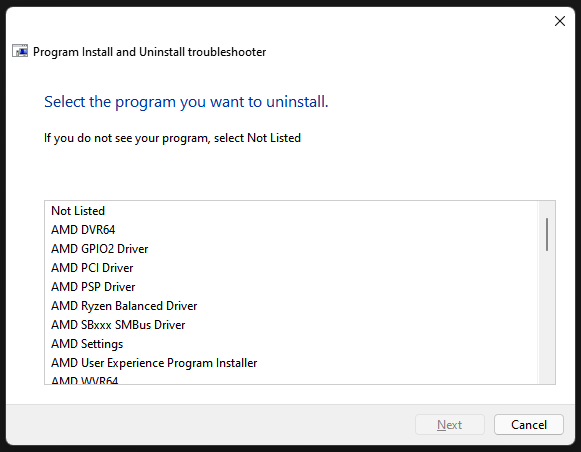
Scroll down to find the Visual Studio list, and it is in alphabetical order.
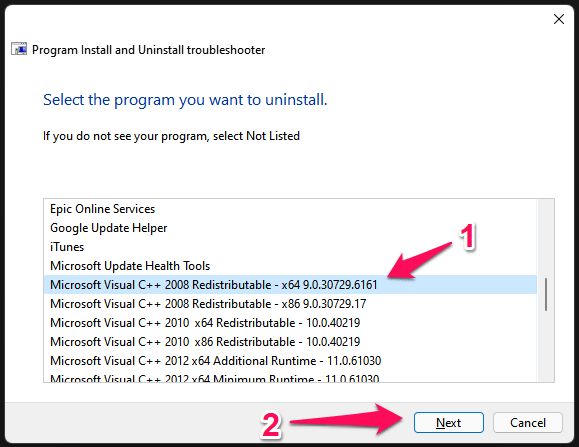
Choose the Visual Studio version, then click on the “Next” option.
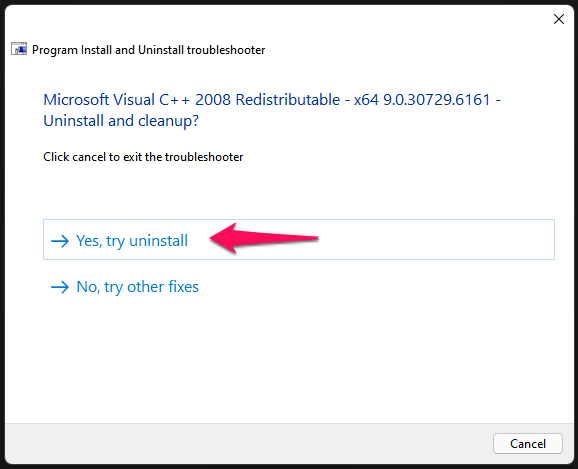
Click on the “Yes, try to uninstall” option.
Be patient.
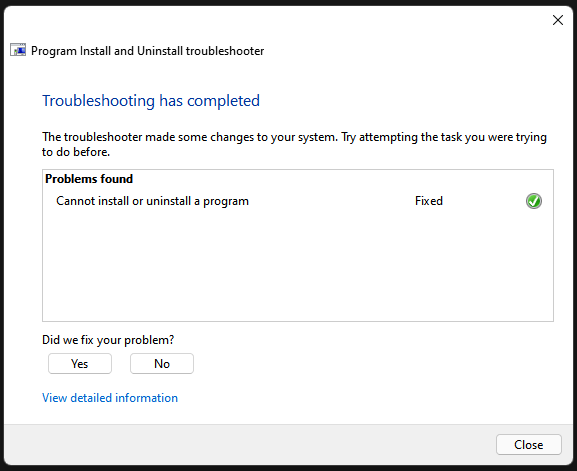
The troubleshooter will uninstall the package from the system.
Now, you can download the Microsoft C++ 2015 – 2019 Redistributable package from the official and install it as usual.
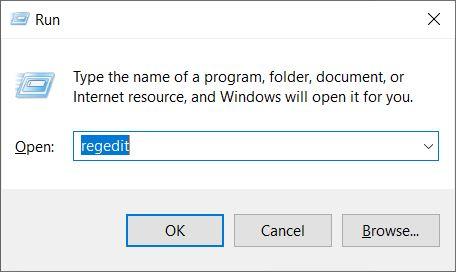
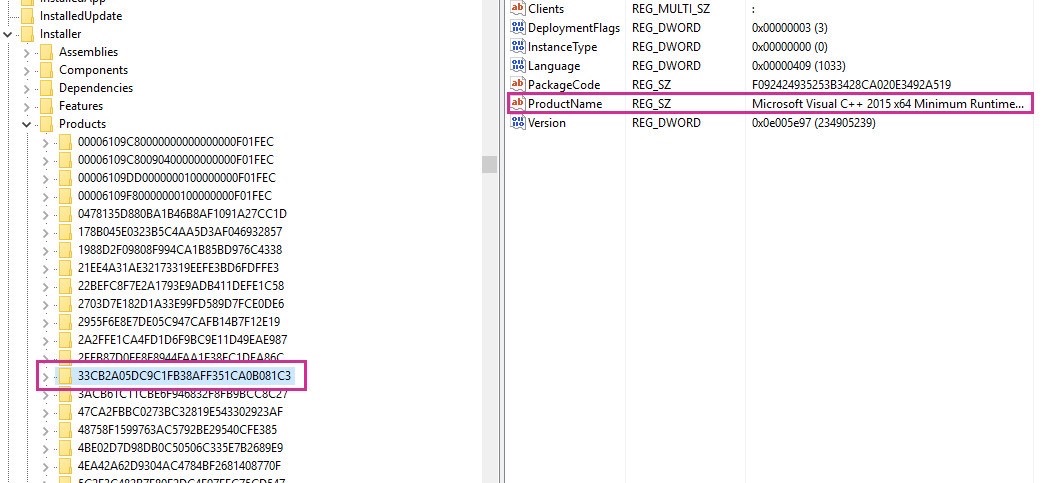
5. Delete Specific Registry
6. Reinstall Windows 11
I couldn’t solve the “The feature you are trying to use on a network resource that is unavailable” problem in the Windows machine. I had no other choice and reinstall the operating system from the official ISO file. I’m not asking you to take the extreme step right away, but I formatted the entire storage drive and reinstalled the software to fix the Visual Studio problem. I asked you to create a system restore point, and you can use it to go back to an earlier point.
Bottom Line
I suggested you reinstall the Windows 11 software in the machine, and it will tackle the virus, malware, adware, and other threats from the PC. You don’t have to flush out the lingering threats in the drive and format the SSD/HDD to get rid of the malware pieces permanently. Visual Studio “The feature you are trying to use in on a network resource that is unavailable” errors are common, but they don’t go away quickly. In the comment section below, let us know what solution helped you solve Microsoft Visual C++ 2015 – 2019 Redistributable error. If you’ve any thoughts on Fix: The Feature You Are Trying to Use in on a Network Resource that is Unavailable in Windows 11, then feel free to drop in below comment box. Also, please subscribe to our DigitBin YouTube channel for videos tutorials. Cheers!
How to Uninstall Discord on Windows 11? iMessage on Windows 11: Here’s How to use it 5 Best Registry Cleaner Applications for Windows 11
Comment * Name * Email *