Nowadays, app development companies lay a major focus on crafting apps that are engaging and user-friendly. It is an industry that is gaining vital imminence as it continues to enhance the reach of businesses by all leaps and bounds. Today, you can hire a mobile app developer for your business app. If you don’t want to spend money then there are online free app creator tools that can create fully functioning mobile applications without coding. These tools require users to provide basic details like the name and type of the app. The whole mobile app development process is made easy through these app creator tools, as users don’t necessarily require any special expertise.
Speaking of one such free app creator, AppYet can turn your idea of an Android app into a reality within a mere 5-minute window. With no charge and coding required, AppYet creates professional-looking Android apps with much ease. So in case, you wish to build an Android application but not sure where to begin from, here’s a detailed guide on how to get going with the AppYet app creator tool.
Steps to Create Android App Using AppYet
Step 1- Create an Account
The first and most significant step of getting started with any app creator tool is to create a valid account. The majority of the tools online require users to head over to the website and Sign Up for their services. So by staying intact with the process, creating an account on AppYet is a necessary step to use the tool.
Besides, signing-up on AppYet doesn’t require too much effort. The app development tool asks for basic details like email address, password, first name, and last name. Post which, you get a welcome mail on your provided email address, and you’re good to go.
Step 2- Fill up the App Details
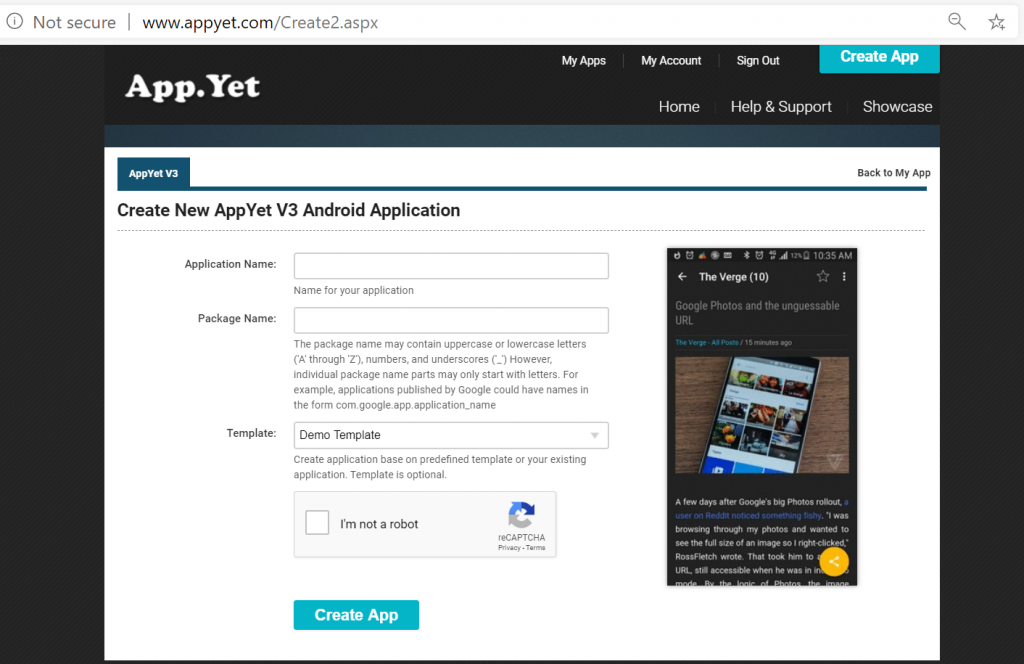
Once you have signed-up, the tool will redirect you to the next step where you are required to fill up certain details about the app you intend to create. Unlike other app development tools, AppYet does not ask for too many details at this point. Here are certain details you need to fill up about the app.
Application Name- This is where you need to fill up the name you have chosen for the app. Package Name- AppYet creates an automatic package for the app. Users have the option of customizing the package name if they feel like changing it. For applications published by Google, the package names go like this- com.[your app name]. Template- Having finalized the package name, you are then required to pick a template for the app. AppYet provides two options- blank template; demo template. The demo template is a predefined template offered by AppYet, which users can utilize without paying any charge. On the other hand, a blank template is an option where you can work with an existing app.
Step 3- Fill in the General Details
It is a point where things start to get a little more creative. Once you’ve given the three above details about the app, AppYet will then redirect you to a dashboard where you’ll fill in the general information one-by-one.
The general details option contains information about the version and icon details of the app. Here users have to fill up details like the version name & code, app icon, notification icon, header image, and the content rating. AppYet offers an option where you get to pick default images for the icons, or you can upload your personalized image in that case. As for the content rating part, the online Android app creator tool offers four options- Everyone, Low Maturity, Medium Maturity, and High Maturity. Users can read more about the Google Play Content Rating guidelines just below the option to gain a detailed insight before picking any one option.
Step 4- The Modules Page
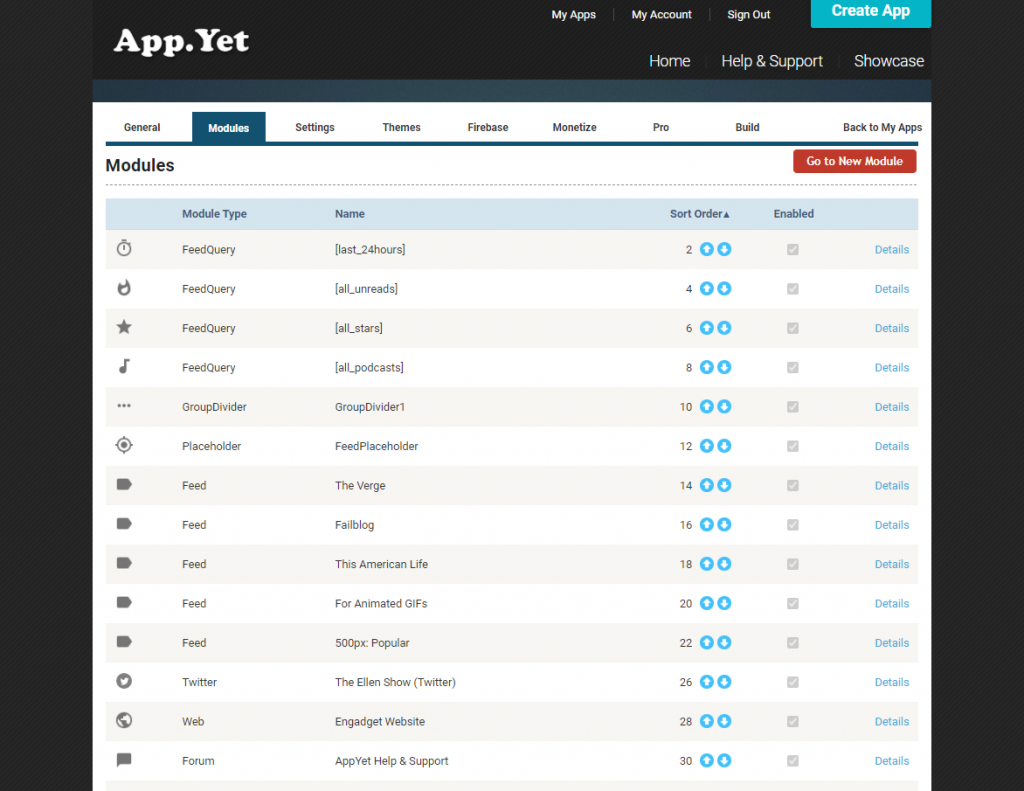
Users can access this page before the General details page as well. Every module on this page is described in a user-friendly way, and you can simply enable or disable a module as per your preference. Take a look at what the modules page has to offer.
Module Type- An option that shows the type of app module you are looking at, users can easily understand the module type and whether they want to enable it or not by simply going through the module type list. Name- This part of the section shows the name of the module you are looking at. Enabled/Disabled- Perhaps the most significant of options in the module section, this option enables users to either enable or disable a particular module. All users need to do is to simply click on the module they wish to enable or disable.
Step 5- The Settings Page
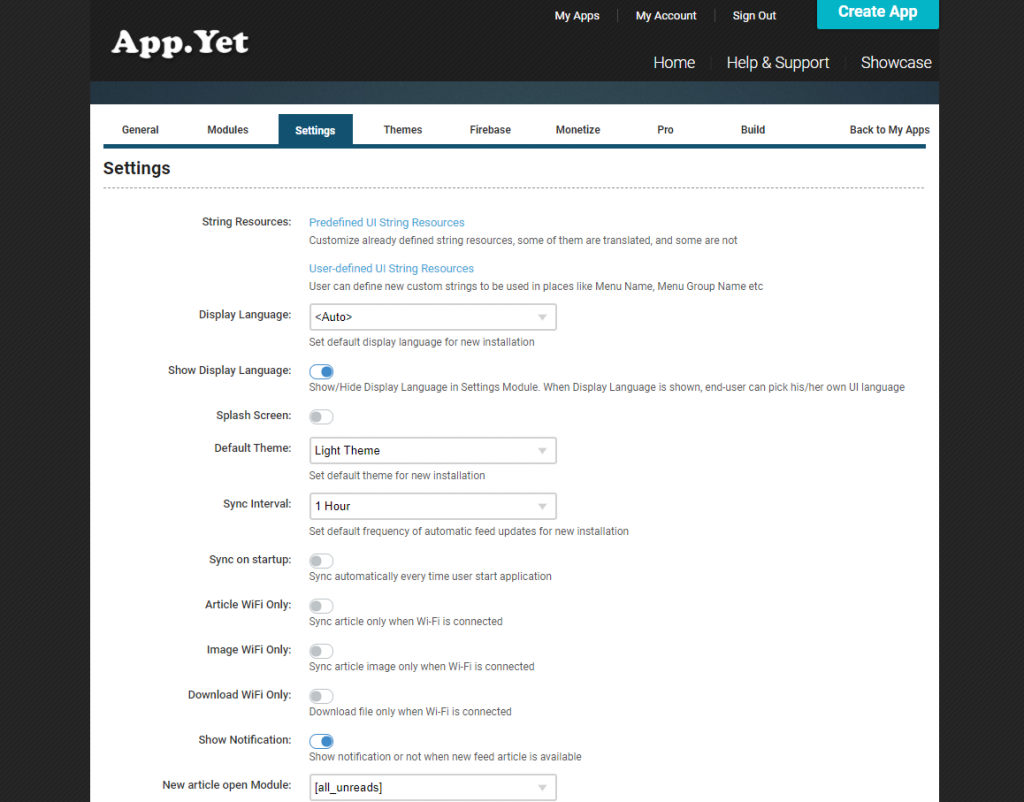
The settings page is perhaps the most significant part of creating an app through AppYet. It is where users can control the way their app is going to function. From picking the most suitable theme to choosing whether or not to show notifications on the app, the settings page takes care of the majority of crucial features.
Take a look at what you can do with the settings page. Pick a Theme- AppYet allows users to pick between two default light and dark themes right through the settings page. Display Language- Users can pick from a wide range of display language for a new installation just by selecting one preferred option. String Resources- Another vital option you need to be mindful of, the string resources option offers User Interface (UI) string resources that are predefined by the Android app creator tool itself. However, users can customize the resources the way they prefer. Sync on Startup and Interval- This is where you can pick the sync interval duration and whether to enable sync every time the app starts or not. Wifi Options- The settings page has multiple wifi-related options on which the users want their sync feature to function when connected to wifi. Notifications- AppYet settings page has one of the simplest of notification setters. All you need to do is to enable or disable the notifications on the app by clicking one simple option. Auto Cleanup- This is an option that allows users to clear the already read articles on the app automatically. New Article Open Module- Pick whether to open and sync a new article with the default module or not. Privacy Policy and Help-Link- The settings page has options where you can add your privacy policy link and the link of a medium through which app users can reach out to you for help. Feedback Email- Last but not least, users can add one email address to get any type of feedback on the app.
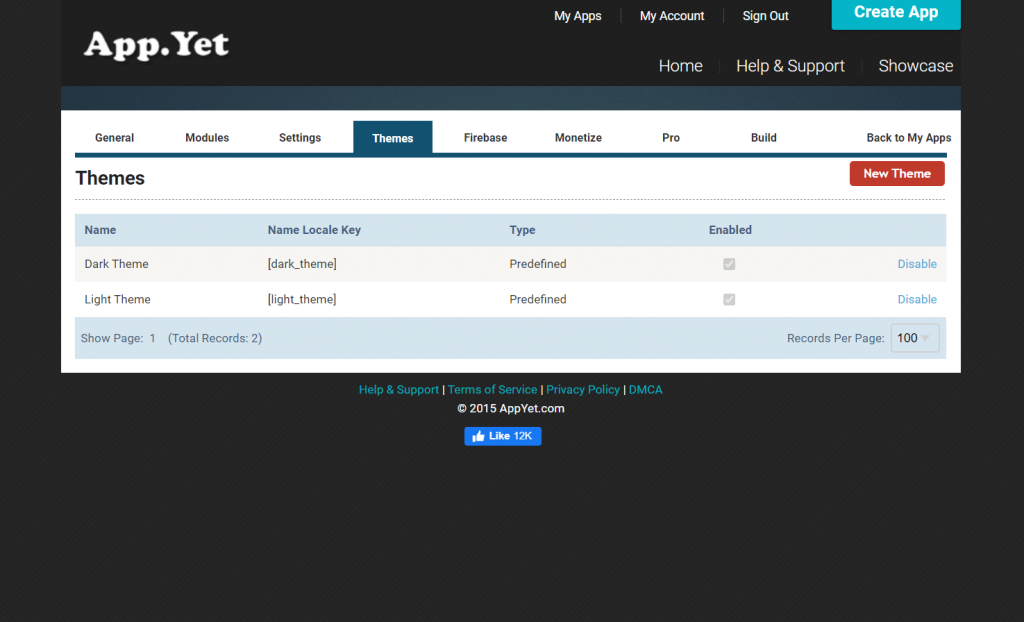
Step 6- Themes
One of the simplest of pages to understand, the themes page allows users to either enable or disable a particular theme. AppYet offers two default themes, i.e., light theme and dark theme. Simply enable or disable a theme by clicking at the respective theme. You may create a new theme of your favorite color. Just click the New Theme button.
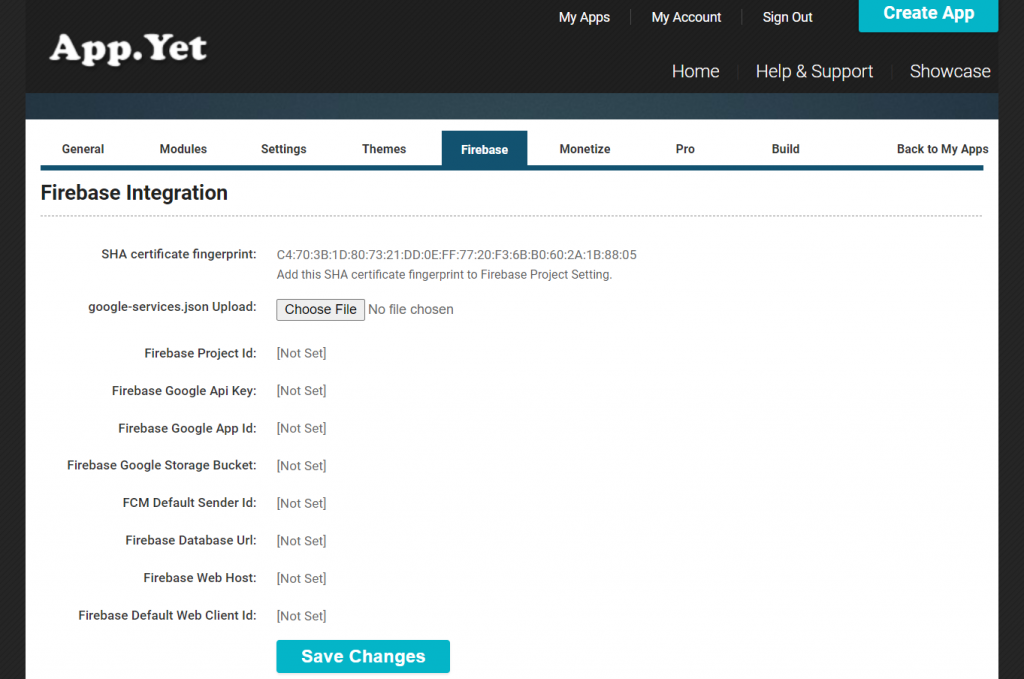
Step 7- Firebase Integration
It is a step where users have an option to handle the Firebase Integration of the app. You can either handle your Firebase integration from here or completely remove the Firebase integration from the application. The page shows options like Firebase Project Id, Firebase Google API Key, Firebase Google App Key, etc. Users should be mindful of two keys options on this page.
SHA Certificate Fingerprint: This is a significant point in creating an application through AppYet. Users need to add the SHA certificate fingerprint provided to their Firebase project setting. Google-Services.json Upload: This is a point where you need to upload your google-services.json file. Adding this file is vital as it allows you to maintain a separate Firebase project for your production APKs.
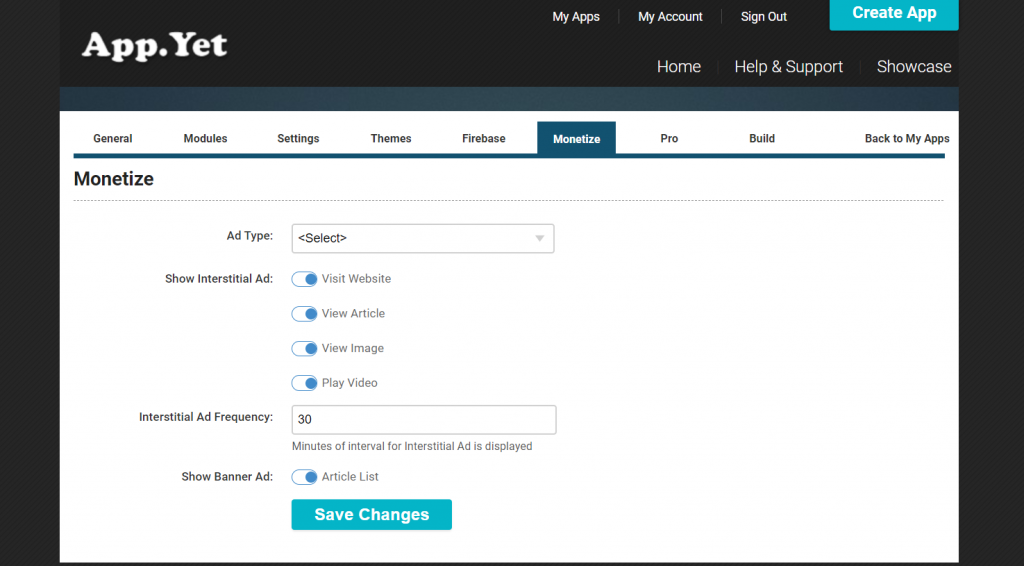
Step 8- Monetizing the Application
Monetizing the app can be done in a number of ways. Through AppYet, users can monetize their apps by placing interstitial and banner ad codes in the Monetize section. The AppYet Android app creator offers ads through the following three different platforms- Google Admob- Held by its parent organization Google, Admob is a platform through which app developers can earn revenue simply by running in-app ads. The app creator works according to the criteria set by the developer. Facebook Audience Network- It is an in-app advertising platform that developers and advertisers can use to serve ads on multiple mobile apps and also earn monthly revenue through it. Flurry- Another such platform, Flurry, offers publishers to monetize their apps through ads from Yahoo App Publishing. While these advertisement platforms can be used by developers and advertisers to monetize the app, AppYet always has an option where you can even remove the ads completely.
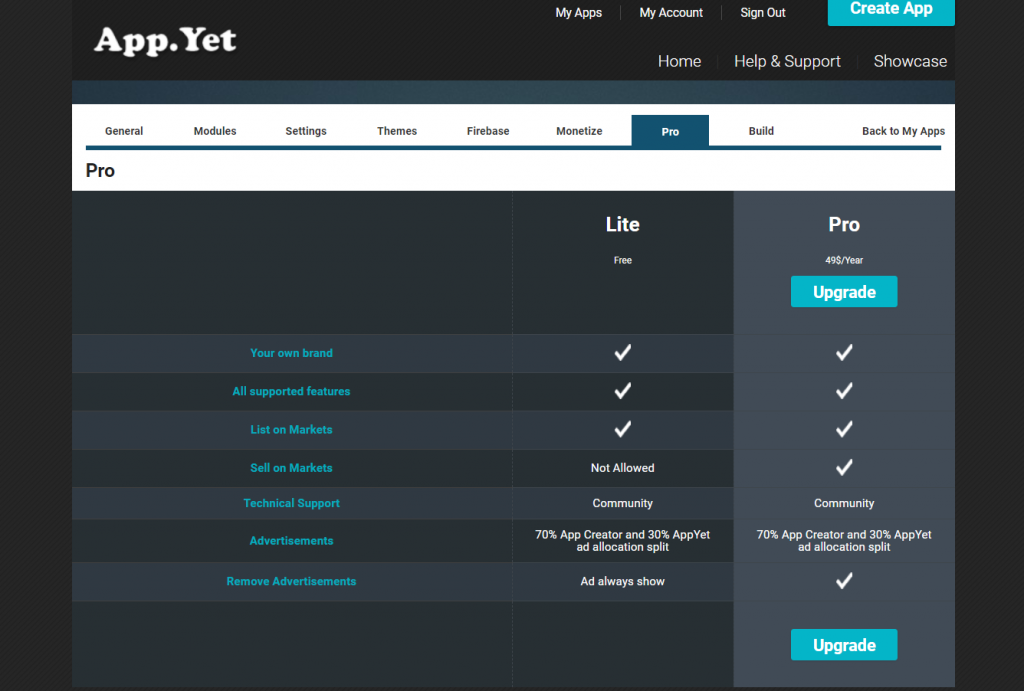
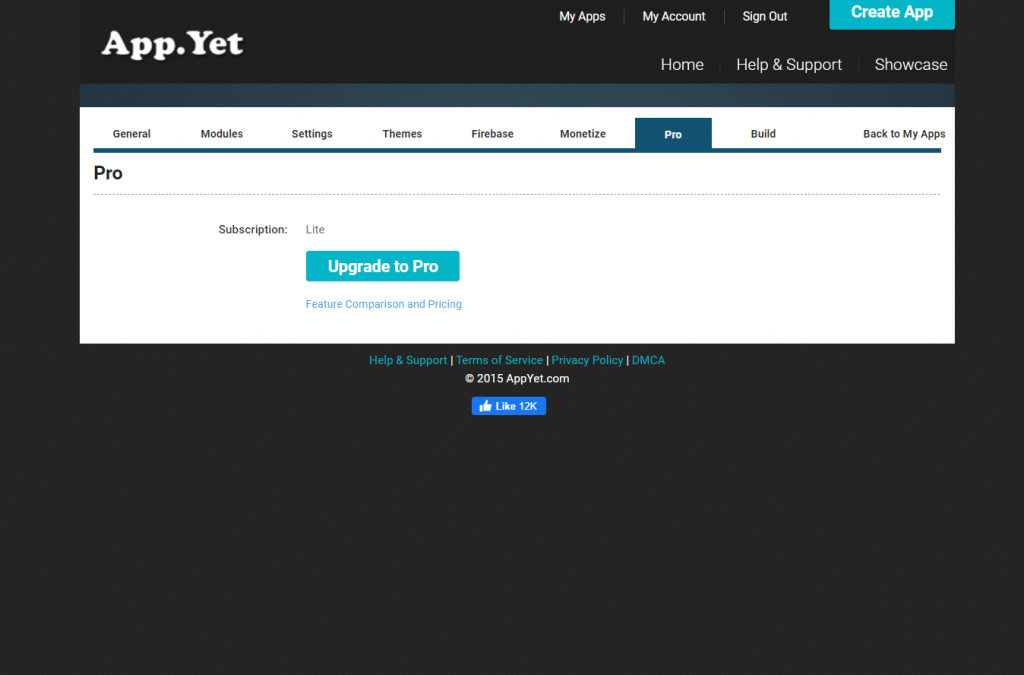
Step 9- Upgrade to Pro (Optional)
Although the services offered by AppYet are free of cost, users can still choose to upgrade to the pro version, and this is a page that makes it happen. The Android app creator allows you to go through the pricing and features comparison before you make up your mind about moving forward with Pro or Lite.
Once you have made a choice, you can simply upgrade to the pro version by clicking at the option on the Pro page. Even before you make any decision, the page will show you which subscription you are currently using.
Step 10- Finalize Building the Application
The last but another significant part of building an app through AppYet is finalizing it. It is a step that shows you the current template, target template, your build status, and much more. The page also guides you through the three vital steps of publishing your application on the Google Play Store. Users can even download the APK file of the app created right from the page itself. The download option is only available when the app-building process is complete. Apart from this, you can also edit the “What’s Next” dialog to show the app users right when they open the app.
So now, you know how an app can be built using the AppYet app creator. We’ve talked about the whole process of building and monetizing the app. But let’s understand the pros and cons of using AppYet in actuality.
Pros and Cons of AppYet App Creator
Every online app creator that we use today has its pros and cons. As for AppYet, let’s take a look at the benefits and drawbacks of using the Android app creator.
Pros of AppYet
No Coding Required: Using the AppYet app creator doesn’t require you to have any special expertise in coding. This is a free app creator and works without any coding. All you need to do is to fill in certain details during the course of 10 different steps, and you’re good to go. 100% Pure Native: One of the best things about using AppYet is that the applications built through the app creator are pure native apps, so you can always expect a better and efficient performance. Option to Monetization: Not only is creating an app through AppYet easy, but you can even generate revenue through the app by running in-app ads. The app creator allows ads from three platforms- Google Admob, Facebook Audience Network, Flurry. Hassle-Free Building Process: Anyone without any expertise in building an app can use and create his/her native app. Just fill in certain details, follow simple steps, and you’re good to go.
Cons of AppYet
Security Issues: The biggest issue which comes with using AppYet is the lack of a database. When there is no database, you are always at the risk of getting major security breaches. Customization Not Possible: It is true that AppYet creates an app for you in a matter of minutes. But when it comes to customizing the app your way, that is not possible with AppYet. No Source Code: There is no source code when you create an app through AppYet. The biggest issue that comes around with apps not having source code is that you are always at the risk of losing the control of your app to someone else’s hands.
Bottomline
The majority of top mobile app developers today focus on crafting apps that make businesses effective and secure, and AppYet is certainly one app creator that can do wonders for the users. However, like any other online app creator for creating applications, AppYet too has its pros and cons. While users can use the free app creator to create an application within a matter of 5 minutes, there are always certain risks involved in using it; however, not many. So for people who have less or no expertise in creating apps can give AppYet a try, while still being mindful of the security risks involved with creating an app through it.